I find back of the box recipes to be reliably good and easy to put together. This recipe, from the back of the Albers' cornmeal box, is a dream to make: put the wet ingredients in one bowl and the dry ingredients in another, then mix them together and bake. They pop out of the muffin tins with ease and are a mix of crisp edges, light crumb and crunchy cornmeal. I also add a dollop of raspberry jam in the center of the muffin batter before baking to really tart up the muffin and turn it into breakfast food with a bit of heft.
Ingredients
1 1/2 cups all-purpose flour
2/3 cup granulated sugar
1/2 cup cornmeal (yellow or white)
1 tablespoon baking powder
1/2 teaspoon salt
1 1/4 cups milk
2 large eggs, lightly beaten
1/3 cup vegetable oil
3 tablespoons butter or margarine, melted
1/3 cup raspberry jam
Preheat oven to 350 degrees F. Grease or paper-line 18 to 20 muffin cups.
Combine flour, sugar, corn meal, baking powder and salt in medium bowls. Combine milk, eggs, vegetable oil and butter in small bowl; mix well. Add to flour mixture; stir just until blended. Pour into prepared muffin cups, filling 2/3 full. Drop in 1 teaspoon raspberry jam onto center of muffin batter.
Bake for 18 to 20 minutes or until wooden pick inserted in center comes out clean. Cool in pans on wire racks for 5 minutes; remove to wire racks to cool slightly. Serve warm.
Tuesday, December 4, 2007
Monday, December 3, 2007
Salted Chocolate Caramels
Making candy always seems intimidating and difficult, which, I have to say, it definitely is. This never stopped me, since I remember begging my mom to let me make english toffee from The Joy of Cooking when I was fourteen or so. I remember us dancing frantically around a stockpot of amber molten sugar trying to discern the difference between hard ball, soft ball and threads fished out of cups of, admittedly, room temperature water. Then my mom poured in a glug of rum, we turned it out onto the counter, waited for a moment, then rolled it up into wax paper bits. They turned out pretty well, as I recall: rich, creamy and slightly grainy, which I find appealing. Sadly, though, there was no trace of rum. The desire to make candy reared its ugly head again last year when I happened upon the Gourmet Christmas issue and a feature for salted chocolate caramels. I hate things that are too sweet, but the salt on top promised a more balanced sort of candy. There were some stressful moments in making these caramels, specifically the point I had to decide whether the candy was soft-ball or hard-ball, but the cooking times given by Gourmet are extremely reliable and now I just cook the candy for fifteen minutes after adding the chocolate and cream. This candy is a little challenging to eat, as it is not the forgiving golden squishy kind, but a hard, stick-to-the-teeth sort that eventually melts into a rich, complex-tasting, chocolatey goo.
Ingredients
2 cups heavy cream
10 1/2 oz fine-quality bittersweet chocolate (no more than 60% cacao if marked), finely chopped
1 3/4 cups sugar
1/2 cup light corn syrup
1/4 cup water
1/4 teaspoon salt
3 tablespoons unsalted butter, cut into tablespoon pieces
2 teaspoons flaky sea salt such as Maldon
Vegetable oil for greasing
Special equipment: parchment paper; a candy thermometer
Grease the the bottom and sides of an 8-inch straight-sided square metal baking pan and line with 2 long sheets of crisscrossed parchment paper. I definitely recommend this step, as I neglected it and was forced to dig out the cooled candy at the end with a knife, sweating and panting.
Bring cream to a boil over medium high heat, then reduce to low and drop in chocolate shards. Let it sit for a minute or two to let the chocolate melt into the cream, then stir till the chocolate is completely melted. Remove from heat.
Place sugar, corn syrup, water and salt in a 5- to 6-quart saucepan. This is very important, because when you add the cream mixture to the sugar mixture the volume of the candy mixture will increase dramatically. At this point, I use a step from The Joy of Cooking: clamp a lid down on top of the saucepan and bring the sugar mixture to a boil over moderate heat. Boil for 3 minutes, or until the condensation washes down the sides of the pan, dissolving any sugar crystals that can ruin the candy. Then take the lid off and cook the mixture until deep golden while swirling the pan occasionally (I don't use a spoon to stir at all at this point). Then add the chocolate cream mixture very carefully. Cook the mixture for another fifteen minutes, stirring with a spoon, till it reaches 255 F on a candy thermometer. I don't have a candy thermometer, so I use another Joy of Cooking trick: I drop bits of syrup into ice water till I get a hard ball that needs to be squished down with my fingers to achieve flatness. Add the butter, stirring until completely melted, then pour the candy immediately into the baking pan, without scraping the pan. I scraped the pan onto another sheet of waxed paper, then broke those bits up for snacking later. Sprinkle the candy with sea salt and cool completely in the pan, about 2 hours. This is very important because candy that is still warm has a tendency to stick to the pan and is then very hard to dig out.
Invert the caramel onto a clean, dry cutting board and peel off the parchment. Then turn the candy sea salt up and cut into 1-inch squares.
Friday, November 23, 2007
Spicy Ginger Cookies
I was looking for a contrasting cookie to go with my "Christmas assortment" this year when I happened upon the recipe for Gingerbread Snowflakes in The Gourmet Cookbook (2004). These cookies are not very sweet, easy to make (you don't have to take out the mixer) and sturdy. This means that you can box them up and send them halfway around the world and they will hold up very nicely. Plus, I think they'll be impervious to kids grabbing and slathering them with icing straight from the tube. The recipe suggested icing them with royal icing, the egg white-based decorating icing, which I didn't do. Subsequently, the the first sheet of cookies didn't seem quite sweet enough, so I sprinkled the rest with granulated sugar. In the future, I might press on some coarse sugar crystals for a prettier cookie. These are a very straightforward kind of cookie.
Ingredients
2/3 cup molasses (not robust)
2/3 cup packed dark brown sugar
1 tablespoon ground ginger
1 1/2 teaspoons ground cinnamon
1/2 teaspoon ground allspice
1/2 teaspoon ground cloves
2 teaspoons baking soda
2 sticks (1 cup) unsalted butter, cut into tablespoon bits
1 large egg
3 3/4 to 4 cups all-purpose flour
1/2 teaspoon salt
Move oven racks to upper and lower thirds of the oven and preheat to 325 F.
Mix together molasses, brown sugar and spices in a large saucepan and bring to a boil over medium heat. My brown sugar was extremely hard but softened up eventually with the molasses and heat.

Stir in the baking soda. Now watch out - the mixture looks innocuous but will foam up to double its volume.

Add butter 3 pieces at a time and stir until melted fully each time.

Then add the eggs and stir. Add the salt and 3 3/4 cups of flour and mix completely to form what looks like gingerbread modelling clay.
 Now at this point, the Gourmet recipe recommended kneading the dough until soft and easy to handle, while dusting with the remaining 1/4 cup of flour. I did knead the dough but did not require any extra flour. The dough handled very easily without the extra flour. Halve the dough, wrap one half in plastic wrap and keep at room temperature.
Roll out the remaining dough on a flour-dusted surface if required ( I didn't need extra flour) into a 14-inch round. Stamp out as many cookies as possible with cookie cutters. For my part, I found that I could fit a huge amount of stars in one round of rolling and cutting.
 An offset spatula (pictured above) really comes in handy here for transferring cut cookies to the cookie sheet. As well, I find it useful to leave as much of the dough around the cut cookie as possible while transferring the cookie; this preserves the cut edge of the cookie and prevents it from getting too squashed while you are moving the uncooked cookie to the baking sheet.
 Grease up your cookie sheet; my mother swears by bacon fat poured into a clean Campbell's soup tin, but I like to use the paper or foil the butter for the recipe was wrapped in. This is an efficient way to use up the tiny bits of butter still clinging to the wrapper. Transfer the uncooked cookies to 2 cookie sheets.
 Put one pan of cookies on the top rack and the second pan to the bottom rack. Bake for 5-6 minutes, then switch positions and bake for 5-6 minutes more. Transfer cookies to racks to cool. Roll out remaining dough scraps and make more cookies. These cookies are crisp, dark, and full of warm spices that would snuggle up nicely beside a plate of buttery vanilla shortbread on a day when its freezing outside.
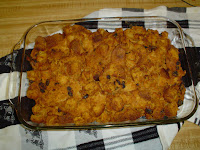
Pumpkin Bread Pudding with Caramel Sauce
My friend Sarah, for some strange reason, loves getting up at 7 am, cooking an entire Thanksgiving dinner from scratch, and feeding us, useless friend sad sacks who do nothing other than buy a couple of pints of ice cream and beer for dinner. She is truly a gem of a friend, one who must be savoured and held up as a prime example of a great pal. Her menus are always homey with a slight twist so that you never feel cheated of a traditional meal but are still startled ever so slightly out of your Thanksgiving rut before you settle comfortably back, relishing every bit. My ghostly longing for pumpkin pie was completely exorcised by this dessert, which is mainly wads of soft, spicy and custardy bread doused in caramel. It is incredibly, richly good. I also really think you should buy a pint of very creamy vanilla ice cream to melt over the top and steal bits of cold cream into your mouth along with the pumpkin-soaked bread. This recipe, with slight adaptation, comes from the Epicurious website.
Bread pudding
2 cups half and half
1 15-ounce can pure pumpkin
1/4 cup dark brown sugar
2 large eggs
1/2 teaspoon ginger
1/2 teaspoon allspice
1/2 teaspoon cloves
1 1/2 teaspoons ground cinnamon
1 1/2 teaspoons vanilla extract
10 cups 1/2-inch cubes egg bread (about 10-ounces)
1/2 cup raisins
I actually baked a sweet egg bread in my bread maker for this recipe, since I knew I would have a hard time finding a nice challah-like bread at my grocery store. Overkill? Probably. But, honestly, it's really easy to bake up a loaf in a bread machine and it tastes so much better than those strange plastic loaves most of us have to deal with at the grocery store (as Nigella would say).
Caramel sauce
1 1/4 cups (packed) dark brown sugar
1/2 cup (1 stick) unsalted butter
1/2 cup whipping cream
For bread pudding: Preheat oven to 350°F. Whisk half and half, pumpkin, dark brown sugar, eggs, ginger, allspice, cloves, cinnamon and vanilla extract in large bowl to blend. Fold in bread cubes. Stir in golden raisins. Transfer mixture to 11x7-inch glass baking dish. Let stand 15 minutes.

Bake pumpkin bread pudding until tester inserted into center comes out clean, about 40 minutes.
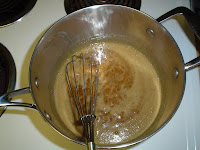
Meanwhile, prepare caramel sauce: Whisk brown sugar and butter in heavy medium saucepan over medium heat until butter melts. Whisk in cream and stir until sugar dissolves and sauce is smooth, about 3 minutes. I actually cooked the sauce for much longer, maybe 10 minutes. It thickened a little more but seemed relatively unaffected.
Serve warm with caramel sauce.
Bread pudding
2 cups half and half
1 15-ounce can pure pumpkin
1/4 cup dark brown sugar
2 large eggs
1/2 teaspoon ginger
1/2 teaspoon allspice
1/2 teaspoon cloves
1 1/2 teaspoons ground cinnamon
1 1/2 teaspoons vanilla extract
10 cups 1/2-inch cubes egg bread (about 10-ounces)
1/2 cup raisins
I actually baked a sweet egg bread in my bread maker for this recipe, since I knew I would have a hard time finding a nice challah-like bread at my grocery store. Overkill? Probably. But, honestly, it's really easy to bake up a loaf in a bread machine and it tastes so much better than those strange plastic loaves most of us have to deal with at the grocery store (as Nigella would say).
Caramel sauce
1 1/4 cups (packed) dark brown sugar
1/2 cup (1 stick) unsalted butter
1/2 cup whipping cream
For bread pudding: Preheat oven to 350°F. Whisk half and half, pumpkin, dark brown sugar, eggs, ginger, allspice, cloves, cinnamon and vanilla extract in large bowl to blend. Fold in bread cubes. Stir in golden raisins. Transfer mixture to 11x7-inch glass baking dish. Let stand 15 minutes.

Bake pumpkin bread pudding until tester inserted into center comes out clean, about 40 minutes.

Meanwhile, prepare caramel sauce: Whisk brown sugar and butter in heavy medium saucepan over medium heat until butter melts. Whisk in cream and stir until sugar dissolves and sauce is smooth, about 3 minutes. I actually cooked the sauce for much longer, maybe 10 minutes. It thickened a little more but seemed relatively unaffected.

Serve warm with caramel sauce.
Monday, November 12, 2007
Rugelach
I am not Jewish. I never met anyone Jewish till I was 20, and I never tasted rugelach until I was 29. Still, I feel that home cooking is as good as a newspaper for glimpsing into a culture, and rugelach beckoned to me. They are slightly tart, tender pastry twists encircling fillings as varied as raisin, apricot, walnut and chocolate. It's strange making food that you know other people are intimately familiar with. They know how much filling to put inside, how to shape them, and how long to bake them. I was in the dark, except for the lost memory of the rugelach I tasted, and some pictures I pulled up on my computer. Rugelach, however, seemed to be a very forgiving type of holiday food. No matter my lack of knowledge, they rolled out agreeably, encased the filling with aplomb, and baked up flaky, golden, and in abundance. This recipe is one for date-walnut rugelach pulled from the Epicurious website. I made two batches of dough. For the first batch, I omitted the walnuts because my husband is allergic to them and substituted additional dates instead. I also reduced the sugar because dates are quite sweet enough and added extra vanilla because I like the fragrance. For the second batch, I became more fanciful: I used a filling of raspberry jam, grated orange peel and almond extract, then dipped the tops in orange sugar. For my part, I liked the date ones the best: they were mildly tart and tender, but with a mysterious, evocative and ancient flavor.
Dough:
2 sticks (1 cup) unsalted butter, softened
8 ounces cream cheese, softened
3 cups all-purpose flour
1/2 teaspoon salt
Confectioners' sugar for rolling dough
For the dough, I softened the butter in the microwave - ten seconds per stick (make sure they're wrapped in paper). Don't put the butter right in the center; the microwave will melt a hole right down the middle. The Epicurious recipe instructed me to sift the flour before measuring, but who has time for that kind of thing? I added my flour unsifted. As well, the Epicurious recipe said to mix up the dough in a food processor, but I don't have one. I used my mixer instead to cream the butter and cream cheese together, then added the flour and salt. After you're done mixing up your dough, shape it into a log, wrap it in plastic wrap, and stick it in the fridge for at least 4 hours and up to 1 day.
Filling 1 (for 1 batch of dough):
12 ounces pitted dates (about 1 3/4 cups) 1/4 cup granulated sugar 1 teaspoon cinnamon 1 teaspoon vanilla
Finely chop dates, stir in sugar, cinnamon and vanilla till well combined.
Cinnamon sugar topping:
1/2 cup white sugar
2 teaspoons cinnamon
Mix together sugar and cinnamon.
Filling 2 (for 1 batch of dough):
1 cup raspberry jam (mine had seeds)
2 tablespoons orange juice
1 teaspoon almond extract
Grated peel from half an orange
Mix together all ingredients.
Orange sugar topping:
1/2 cup sugar
Grated peel from half an orange
Mix together sugar and orange peel.
Preheat oven to 350 degrees Fahrenheit. Remove dough from refrigerator and cut into 8 equal pieces. Dust your work surface and rolling pin with confectioners' sugar and roll out one piece into an 8-inch round. It takes a while for the dough to warm up sufficiently enough to roll out easily, so be patient. Cut the circle into 8 wedges. Now grab 1/4 cup of date filling or 2 tablespoons raspberry jam and distribute evenly around the circle, 1 inch from the outer edge.
 Above: Unrolled date rugelach
 Above: Unrolled raspberry rugelach
Roll up each wedge from the outer edge to the point to make a tiny croissant. I was supposed to turn under the outside edges to enclose the filling, but I forgot and some of the jam spilled out while baking. Oh well. Dip the tops of the rolls in the sugar topping and line up in satisfying rows on your cookie sheet. Now bake your rugelach by first putting your cookie sheet in the lower third of the oven for 7 to 10 minutes. Then transfer the cookie sheet to the top third of the oven for 7 to 10 minutes. Transfer to racks to cool completely. These also freeze very well, so stash some away for when unexpected guests stop by around teatime.
 Above: Baked Date Rugelach
 Above: Baked Raspberry Orange Rugelach
Monday, November 5, 2007
The Cheese Board Cookbook
 I love cookbooks - mostly as a nice thing to read before drifting off to sleep. When I was a kid, I used to keep The Joy of Cooking beside my pillow and dreamed of dressing squirrels and angels on horseback (oysters wrapped in bacon on toast rounds). I generally did not use my cookbooks for actual cooking, but relied instead on the cook-as-artist's method of inspiration drawn from cookbooks plus constant tasting. One day, however, my husband bought me The Cheeseboard cookbook "The Cheese Board Collective Works". For those who have never heard of The Cheeseboard Collective, it is a worker-owned and -operated bakery, pizzeria, and cheese shop in Berkeley, California in which all members have equal decision-making power. Sadly, I have never been to The Cheeseboard, which is strange because I live maybe forty minutes away. In lieu of eating at The Cheeseboard, I have found that The Cheeseboard Cookbook is a superior cookbook. Everything I have cooked from it tastes unbelievably delicious. The chocolate chip scones are gigantic, flaky, buttery, and studded with bitter bits of chocolate. My cousin keeps asking for the corn cherry scones, which are slightly sweet, crispy with cornmeal, and tender within from buttermilk. Their recipe for sourdough starter worked like a dream for me, despite starting my culture with white whole wheat flour instead of organic rye flour. The baguettes were beautifully sour and chewy, with large holes and a very thick deep brown crust. The piece de resistance was
  when I used some of the master sourdough dough to make their tomato pizza with lemon zest. The mozzarella formed a thick chewy layer under the meaty plum tomatoes, set off by a thinly browned crust of mozzarella and crumbles of feta over top. After it came out of the oven, I brushed the crust with garlic oil and shaved lemon zest over top. In addition, I shaved Asiago cheese and crumbled fresh thyme instead of cilantro over all. I did this because I dislike cilantro in my food unless it is Indian or Mexican. I then squeezed fresh lemon juice on the pizza and served it with lemon wedges on the side. My husband gave it the highest compliment: he proclaimed it the best pizza he had ever tasted. And it truly was: a sour, chewy, crisp crust with sweet tomatoes, melted salty cheese, briny lemon and earthy herbs. It was the utmost compliment coming from a fella who would normally take a slice of Hawaiian pizza any day.
Thursday, November 1, 2007
Caramel Rice Krispie Marshmallow Beasts
In high school, my best friend's mom was the best cook and a crack baker. She made the best school lunches - tomato AND mushroom soup, the creamiest Kraft Dinner - that's Kraft macaroni and cheese, and boiled hot dogs. All this while watching The Flintstones on their cushy beige velvet couch. I'm not sure why her soups tasted so good, since our moms all cooked the same Campbell's soup for lunches. It had something to do with the old balloon whisk and whole milk she mixed hers up with. One day she popped open her Tupperware container and gave me a gigantic marshmallow bristling with Rice Krispies. I bit into its belly gingerly. The taste was like sweet, smooth and crisp, with a deeply golden milk flavor surrounding a sweet puff of nothing. They were the product of unwrapping a pound of Kraft caramels and melting a can of condensed milk into them, then coating marshmallows with the caramel and rolling them around in a plate of Rice Krispies. I never forgot that milky caramel flavor, so I dipped and rolled a batch. They are a bit fussy to make, but they freeze well and are delicious beasts indeed.
1 16 oz. package of large marshmallows (stash them in the freezer overnight for easier dipping)
1 16 oz. package of caramels (Kraft, which come in 16 oz. bags, or Brach's, which come in 11 oz. bags. I think Brach's caramels have a richer, milkier taste)
1 14 oz. can of condensed milk
1/4 c. butter
Rice Krispies to coat (about half of an 18 oz. box)

Stick some Rice Krispies into a container with high sides. I used a loaf pan, which preventing cereal escaping all over the floor. Stash the caramels, condensed milk, and butter in a smallish saucepan that is deep enough for dipping and melt over low heat.

It's difficult to stir at first but make the effort as the mixture burns easily. When the caramel is completely liquid, switch the heat to the minimum and give it a stir once in a while in between dips. Plunge in a marshmallow and worry it around with a fork to coat it, then fish it out and let the caramel drip between the tines. My first attempt was to impale the marshmallow on a skewer, which was really difficult to remove after dipping.

Drop the caramel-coated marshmallow onto your Rice Krispies and use a second clean fork to move it around and coat it fully with cereal. Then place your marshmallow beast onto a cookie sheet lined with wax paper, and continue till the marshmallows are gone. To freeze, place them onto a cookie sheet lined with wax paper, and stick in the freezer till hard. Then pop into freezer bags for stealthy sweetness later.

1 16 oz. package of large marshmallows (stash them in the freezer overnight for easier dipping)
1 16 oz. package of caramels (Kraft, which come in 16 oz. bags, or Brach's, which come in 11 oz. bags. I think Brach's caramels have a richer, milkier taste)
1 14 oz. can of condensed milk
1/4 c. butter
Rice Krispies to coat (about half of an 18 oz. box)


Tuesday, October 30, 2007
Ketchup Chips
 Canada does not really have cuisine. Canada mostly has fresh ingredients, the regional cooking of immigrants and back-of-the-box cookery. Canada does have, however, excellent snack foods that seem to have their roots stuck very deeply into the English traditions of crisps and chocolate. Ketchup chips have their detractors by people who detest a sweet-sour chip. I, however, love them and would eat them as often as I could get my hands on them. I hung around rinks most of my life and, to me, there is nothing like snapping open a crisp bag of Old Dutch ketchup chips after a few hours on the ice. I'd stop along the way to wish upon my wish chips, take a mouthful of cold Sprite, tip the bag up to catch the last few crumbs, and finish up by licking my thumb and middle finger. These would stay pink for the rest of the day. When I was stuck with a bag of plain or ruffled chips, I would try to approximate the experience by putting ketchup on my chips. It's just one of those acquired tastes, like eating yeast on toast. Also, stay away from Hostess chips. Old Dutch has a much higher ratio of ketchup powder to chip, ensuring a solid ketchup experience. It's a small culinary oddity, but a worthy one. Now if only Old Dutch would do a sharp English mustard chip...
Monday, October 22, 2007
Yuzu Honey
 I was over at my friend's house, rummaging in her fridge for something nice to go along with our chamomile tea, when I happened upon a large, squeeze-type bottle with Japanese printed on it. "It's yuzu honey," she said. I obligingly squeezed a tiny drop onto my finger to taste and was instantly transported to a more fragrant, citrusy realm. Since my friend's sister has finished graduate school and left Japan, I was in agony, knowing that I would be hard pressed to locate a source of yuzu honey. I eventually trekked over to my local Japanese grocery and located a tiny bottle of yuzu juice. It was eight dollars, but it was worth it. It has a very tangerine-like flavor, but more perfumy and perhaps a little more salty. I tried mixing it with Eggman Farms honey labeled "Mountain Flora". The bees visit tiny mountain wildflowers to create a very mild honey, which at first tasted quite strong but after mixing with yuzu juice melded into a sweet-tart yuzu flavour. Try mixing one teaspoon yuzu juice with two tablespoons honey.
Northern Gold Granola
 Granola is for hippies. This is what I used to think. Granola conjures up memories of my roommate stirring giant cookie trays full of oatmeal, honey, almonds, dried cranberries and my cinnamon. Everything was organic except the cinnamon. Then one day I began to think about whole grains. This was after I tried to stop eating white flour and sugar and subsequently my ravening appetite in the mornings went away. The wolf at the door was gone, sent away by granola. Most brands of granola paint themselves as healthy, but do not be fooled. The raisins are coated in coconut oil and there is twice as much honey as there needs to be. Northern Gold is a very satisfying kind of granola. You really do taste the grains, the honey, the almonds and the sesame. The list of ingredients is very short, which is a good sign for me. The cereal is roasted in such a way as to give it a caramelized flavor, which it then lends to the milk. I eat this granola every morning and sometimes for supper too with some fruit. My only problem is that my local grocery store ran out of the blueberry and raspberry flavor, which features freeze-dried bits of berry. These retain a very good berry flavor. I took this disappearance to be an ominous portent. Then the honey almond flavor went on sale and, gradually, it was gone. I am not sure what to do now, short of ordering an entire case from Northern Gold. Perhaps I will make my own. Or perhaps I will begin life as a granola lobbyist.
Subscribe to:
Posts (Atom)

